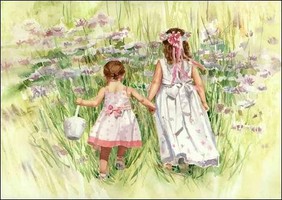
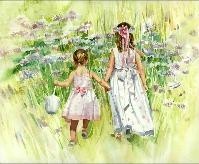
Down to the Meadow Painting Figures Step by Step
Step 1 - Sketch
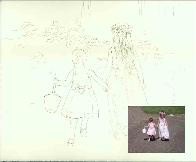
Using pencil, begin with an outline of the shapes.
Avoid sketching too much detail. This helps you avoid "Coloring in the lines". You will be more creative and spontaneous. Move in new directions if you see interesting things happening.
Note: Pencil lines can be erased when the painting is completed, however, visible lines are considered acceptable in a watercolor painting.
Step 2 - Light Wash
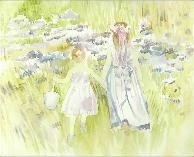
Begin with the lightest washes (diluted paint) throughout your painting. Leave the white of the paper on those areas that you want to remain white.
This overall wash allows you to see the relationship of colors and determine if the composition is successful.
Avoid working on only one area of the painting from beginning to end. A beginning wash will allow you to change composition and color if it seems appropriate.
Step 3 - Medium Washes
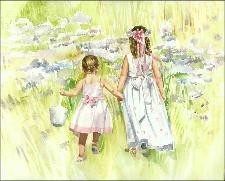
Continue applying medium value washes throughout your painting. As you paint, remember to leave the white & light washes alone. You will notice that the painting is beginning to have contrast and a feeling of "depth."
Step 4 - Darks & Detail
The darkest values and detail are the last stage of the painting. They help to create the "focal" point of the painting. Use those techniques in the area of the painting that you want the viewer to notice first.
Down to the Meadow Final Painting